

What Is The Checkered Background In Photoshop
How to remove a background in Photoshop
If you're new Photoshop, knowing where to start when it comes to removing a background can be daunting. Photoshop has many different means you tin attain this, some faster than others, some a niggling more time-consuming and circuitous. There's no right or wrong way, it's about picking the correct approach for the job in hand.
In this Photoshop tutorial, we'll cover some techniques you tin can use to remove a background, each using different tools. We'll start with ii of the nearly bones approaches: the Magic Wand tool (this page) and Quick Pick tool (jump to page 2). And so we'll move on to the more complex method of using channels alongside the Refine Edge tool (page three). Finally, we'll await at using removing backgrounds using the Pen tool, paths and masks (folio 4). Let's get started...
Use the icon in the summit right of each image to enlarge it.
The Magic Wand tool is possibly the quickest and simplest way to remove a background in Photoshop, provided your prototype has clearly defined edges. It works all-time when there is a good amount of contrast between your groundwork and foreground and when one of these elements is a solid apartment colour.
01. Start with a basic selection
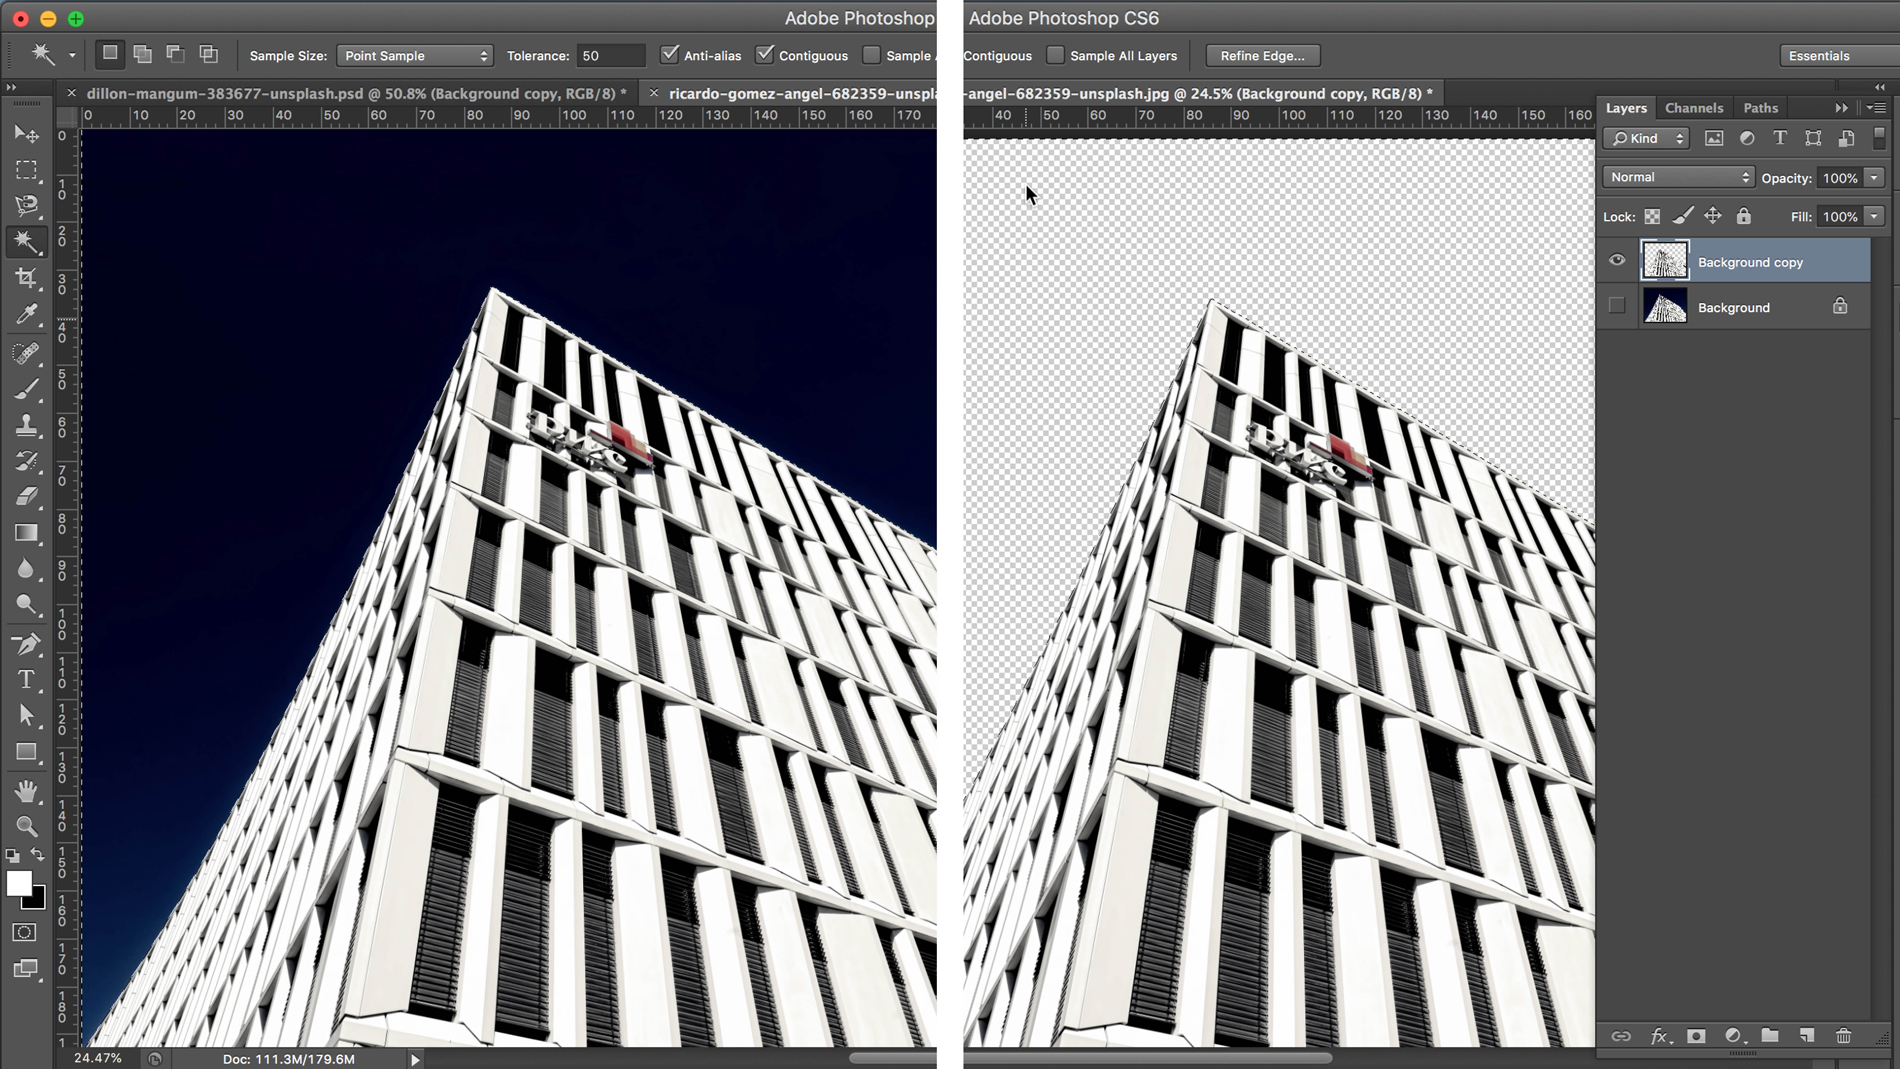
Open your paradigm and duplicate it, before hiding the background layer. This provides an piece of cake way of referring back to the original image should you lot need to. With the new layer selected, select the Magic Wand Tool from your Tool panel (Shortcut W and shift+W to toggle between tools), select the flatter area of the epitome and delete.
02. Adjust Tolerance levels
The Magic Wand tin be quite limiting every bit a tool for removing a background, but by making adjustments to the Tolerance of an image you can select and remove a slightly trickier background, providing the part you desire to cut out nevertheless has conspicuously defined edges.
You employ the Tolerance settings (found in the Options bar) to adjust the range of colour values you want to select at one time: increase the value and information technology will select a wider range of colours, subtract the value and information technology volition select a narrower range.
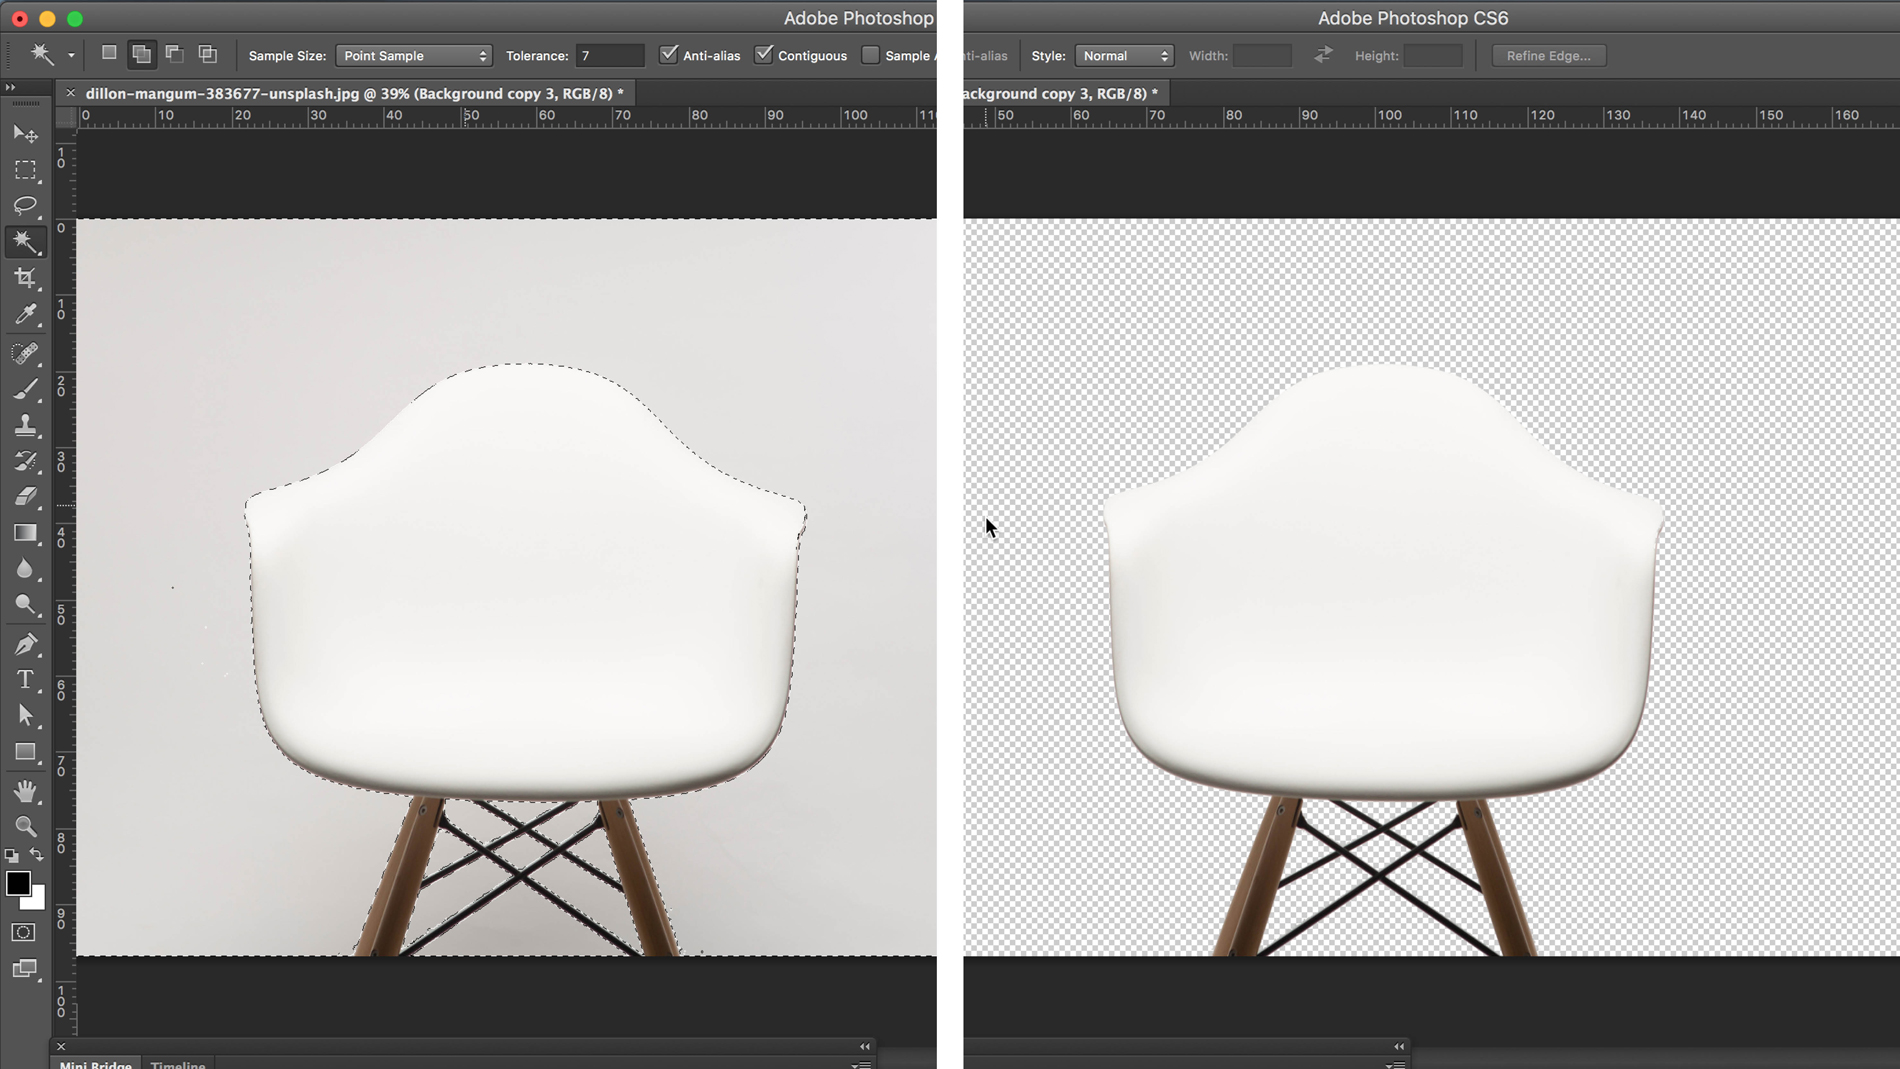
For images similar the 1 above where the foreground object and background are a similar colour, you need to reduce Tolerance levels so the Magic Wand tool recognises the groundwork every bit a separate colour. Here, the Tolerance has been reduced to 7. Then yous tin utilize the Magic Wand tool and the shift key to select unlike areas of groundwork until you have the bulk of information technology.
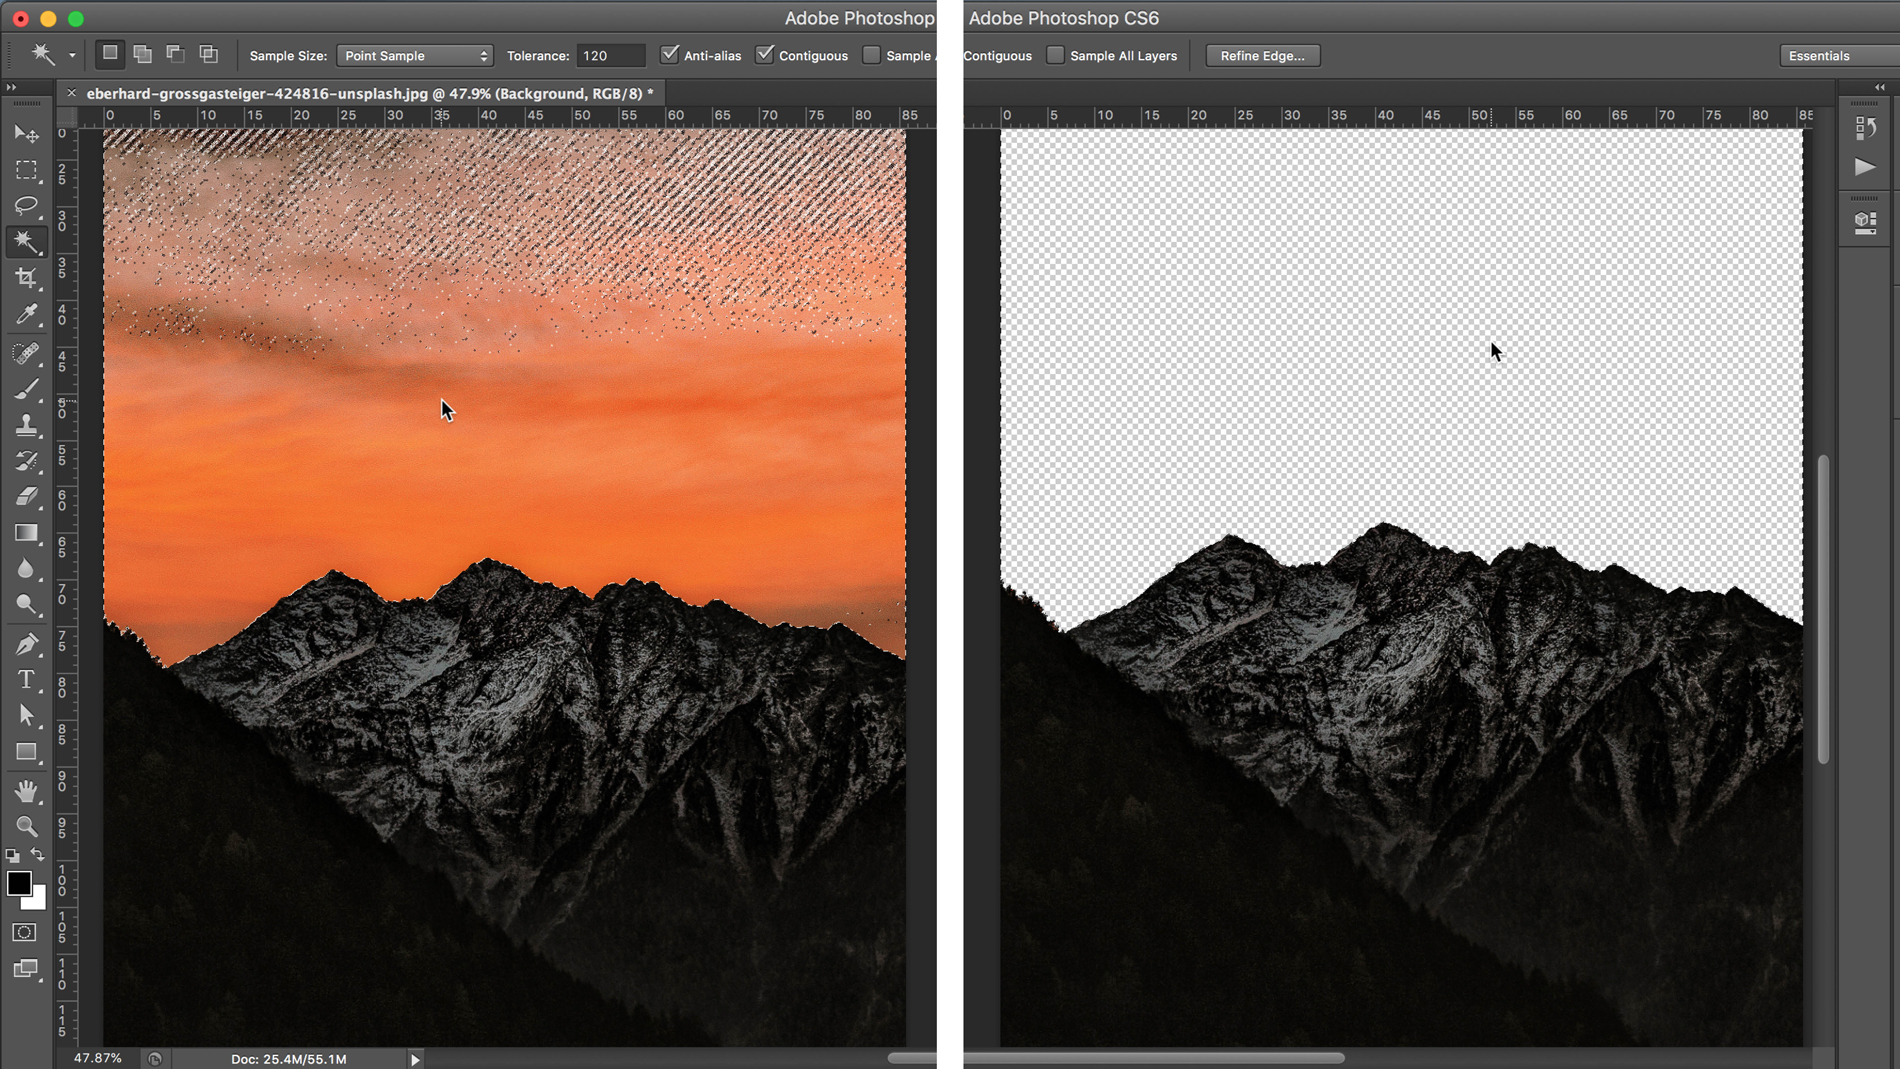
Alternatively, in an image where there are lots of unlike colours in the background, only a clear contrast betwixt the colours in the foreground and groundwork, you lot need to increase the Tolerance levels.
For case, in this paradigm of dark mountains confronting an orange sunset, Tolerance has been increased to 120. Once more, select a small-scale portion of the background using the Magic Wand tool, and so shift-click whatever other unselected areas of sky until all of information technology has been selected.
03. Neaten things upward with Layer Masks
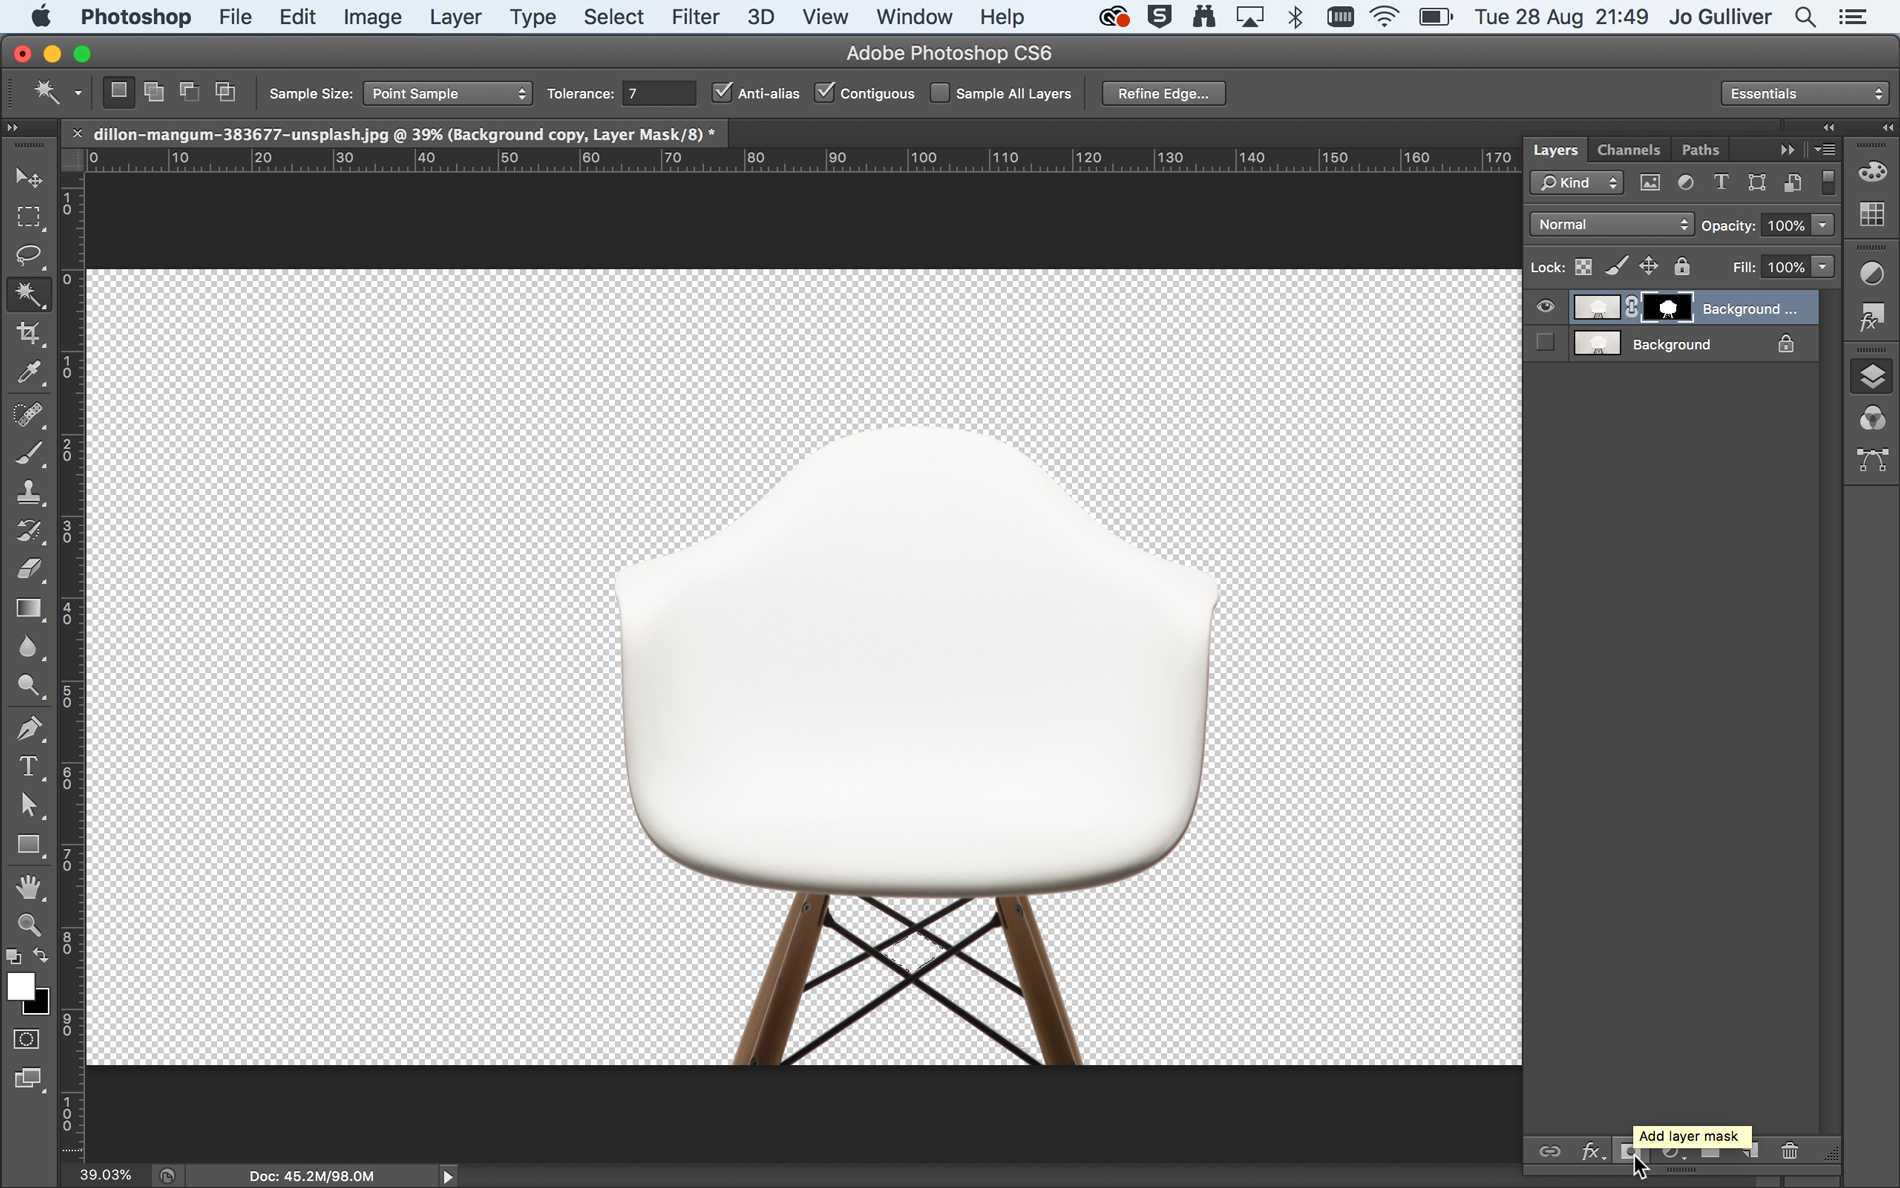
The Magic Wand tool is great for a quick cutout, merely the downside is that it doesn't leave you with the cleanest of edges. Plus, if you're doing a multiple choice, this technique tin also leave you with stray pixels in the background. But there are a couple tricks you can use to better on both these things.
For this example, we'll got back to the chair image. You've already selected as much of the background as possible using the Magic Wand tool, with Tolerance set to 7. Once yous're happy with the background selection, instead of deleting it, create a mask.
First, you need to invert your selection. Select Changed (under the Select card, or shortcut cmd+shift+I) and then select the Add Layer Mask button (see prototype) found at the bottom of the Layer panel.
04. Use Layers to selection up stray pixels
Using a mask when editing your image means you accept more control as information technology is non-subversive. This means pixels are not deleted, just hidden, so you can re‑edit the masks by removing or repainting in parts of the original paradigm.
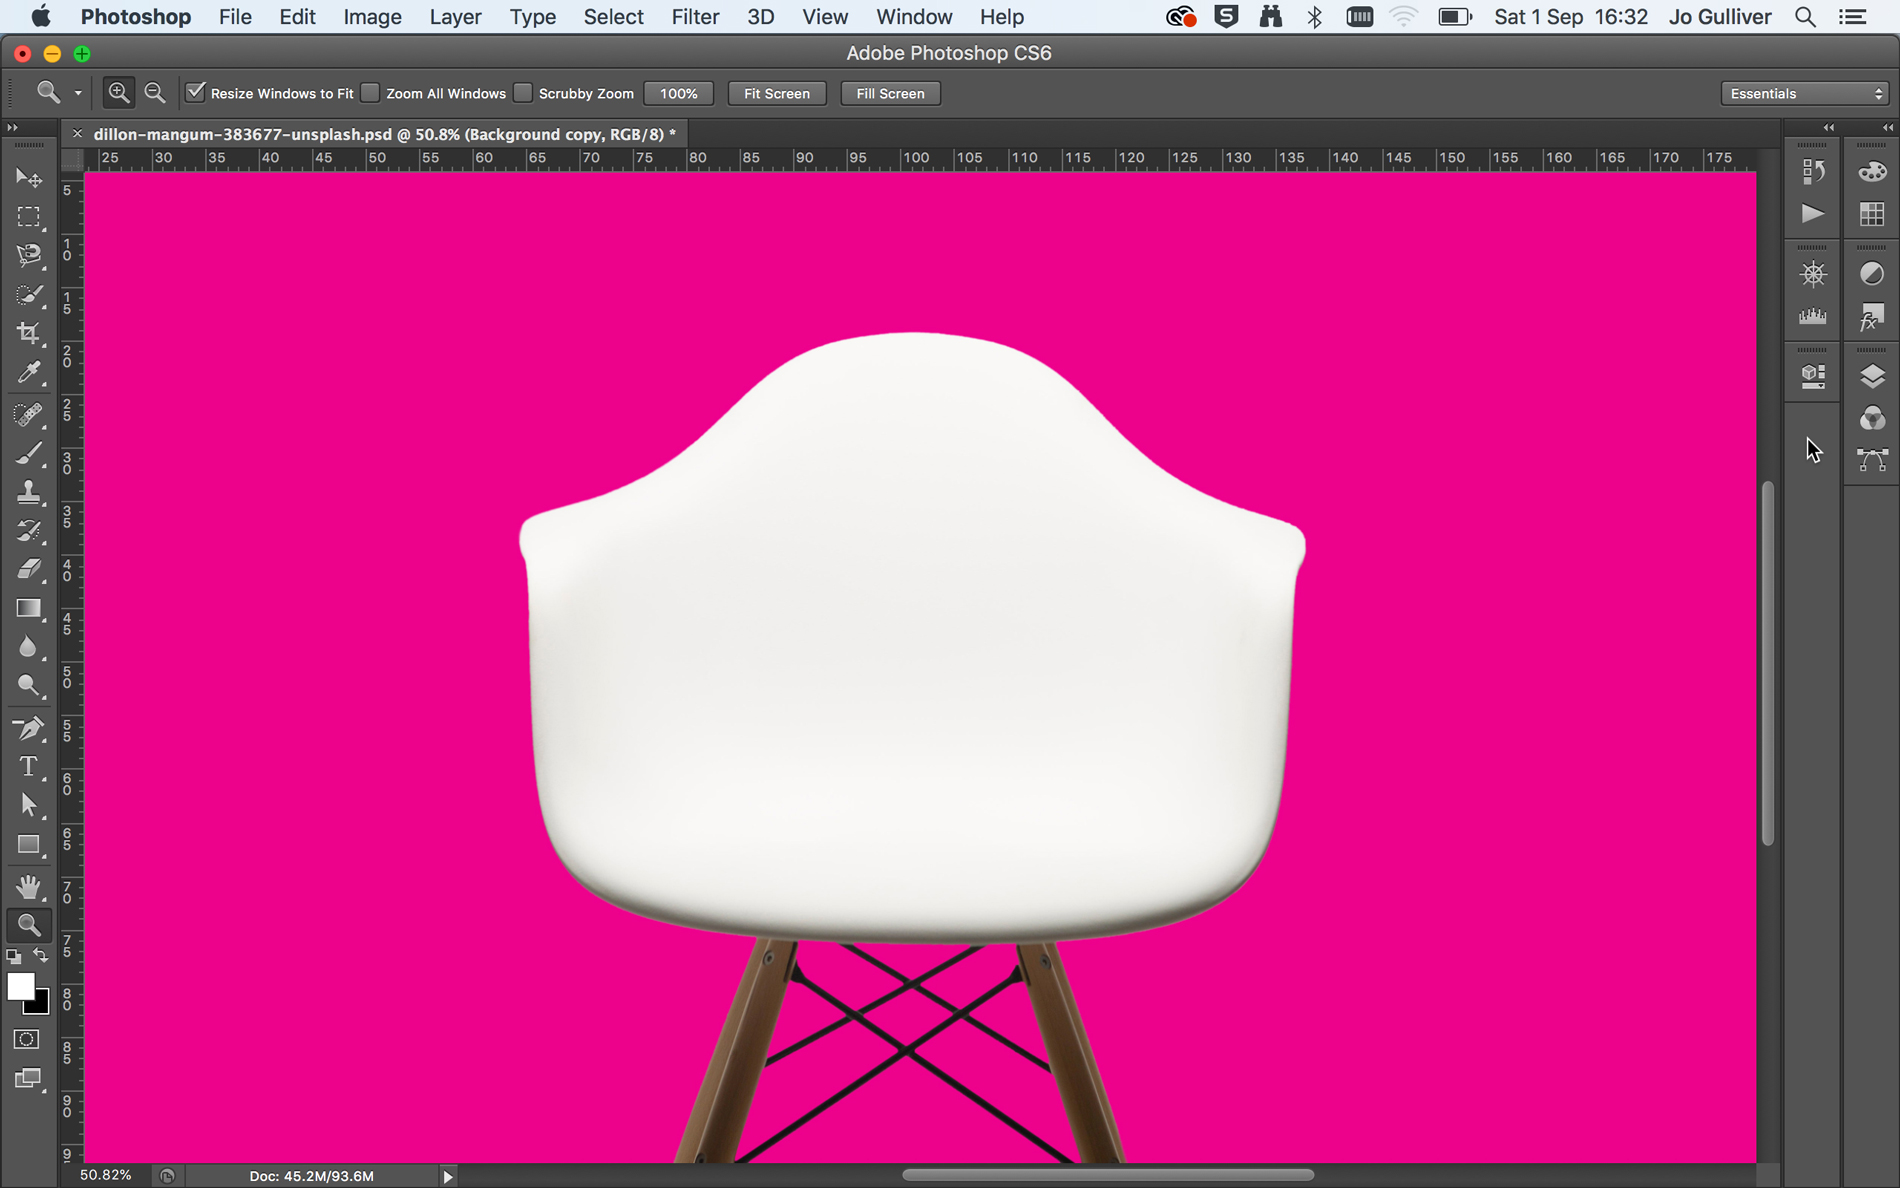
To see clearly how slap-up your edges are, create a new layer using the New Layer button at the bottom of the Layers panel. Fill this layer with a solid, bright color and identify information technology beneath your mask layer. If yous zoom in, you can see the limitations of the Magic Wand tool; it can leave edges very jagged and litter your image with stray pixels.
Layer Masks allow you to clean up and finesse your image. In this instance, the starting time thing to practise is get rid of any devious background pixels that were not selected with the Magic Wand tool.
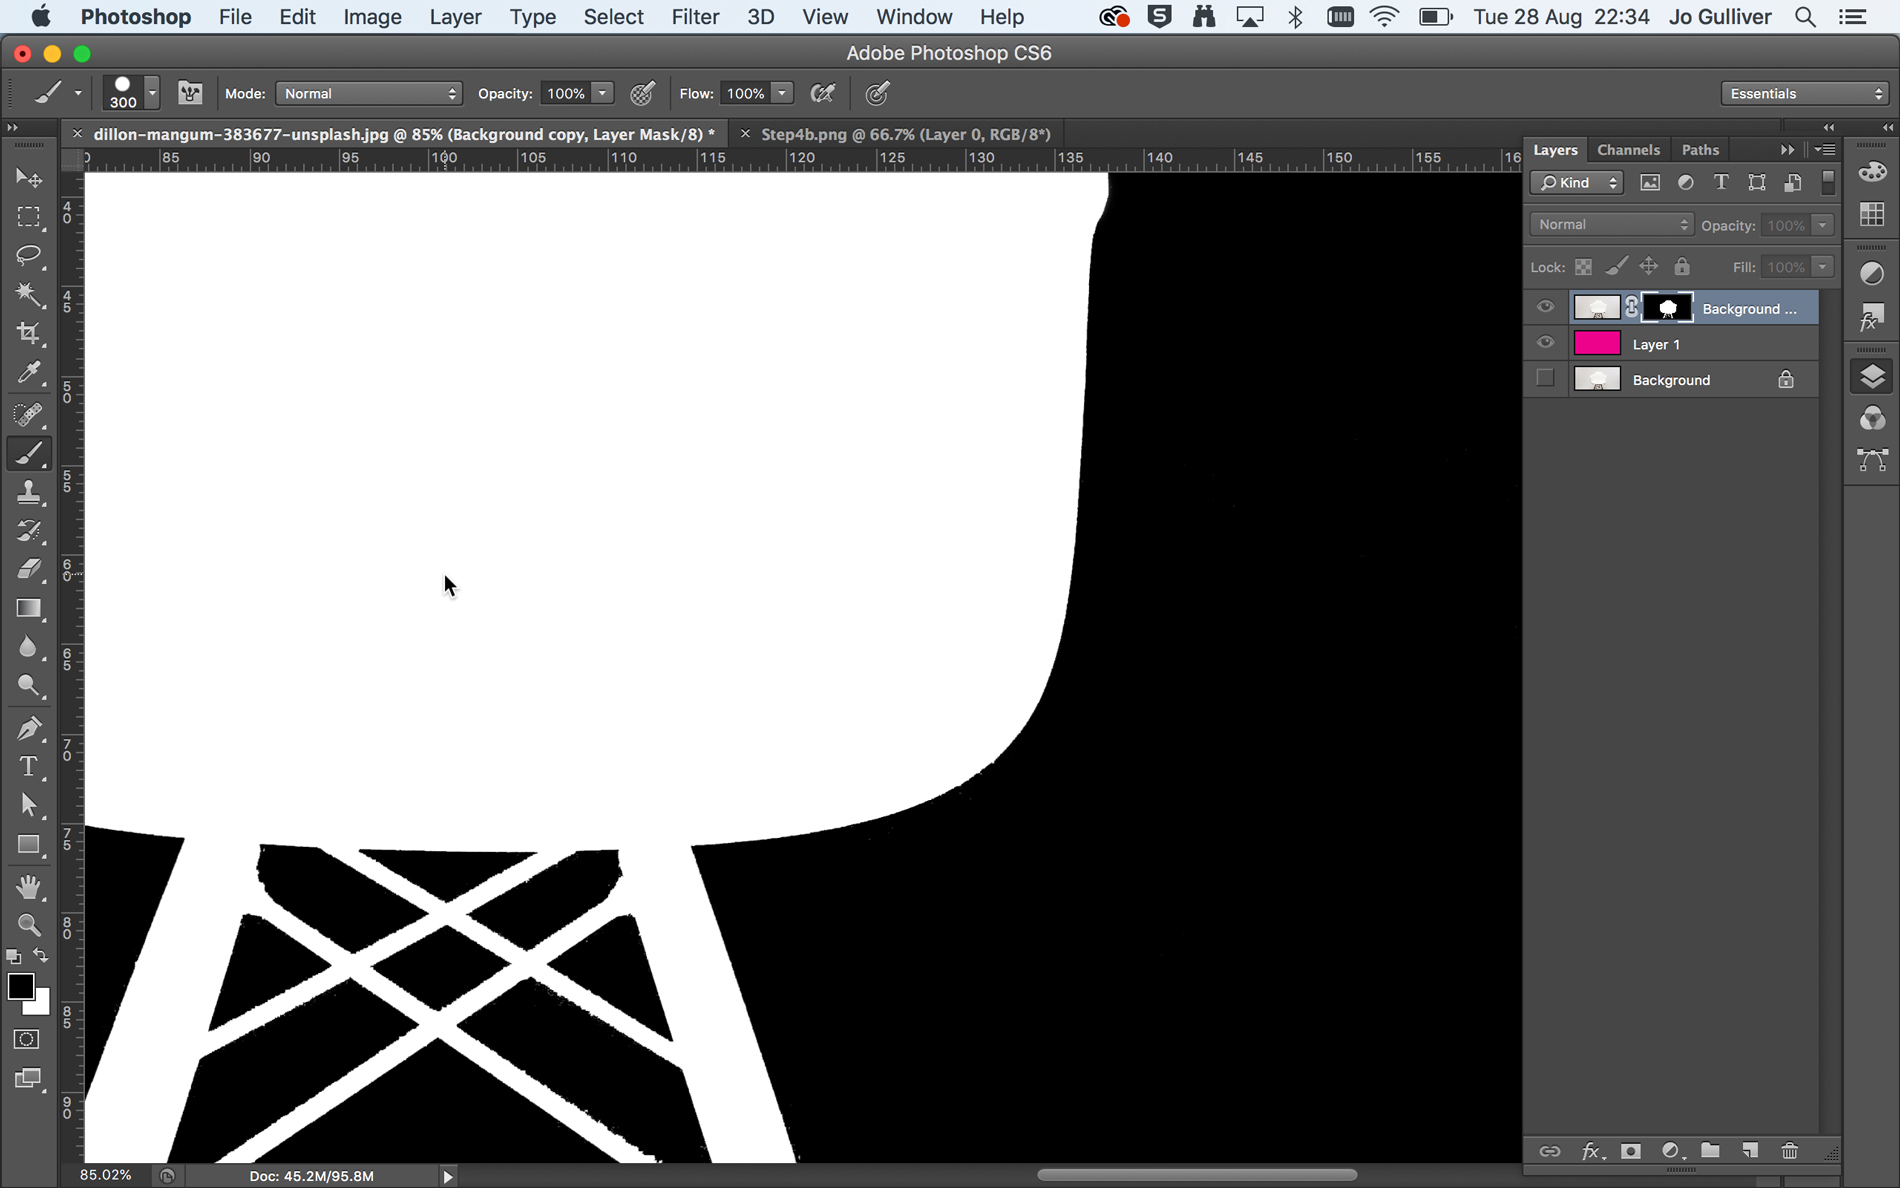
Do this by alt-clicking on the Layer Mask thumbnail in your Layer panel. This volition convert your artboard to the blackness and white Layer Mask view. Fix the foreground colour to blackness, select a Paintbrush tool and beginning filling in those stray pixels and tidying up the edges of your image. Employ the [ ] keys to decrease or increase the brush size to comprehend larger or smaller areas of your artboard.
06. Finesse your Layer Mask
Click back on the background image to get out the Layer Mask view, then reselect your Layer Mask thumbnail to make it agile. Have some time to apply the Castor tool to tidy upwardly your image and get rid of some of the harsh, jagged edges.
In areas where you have more than dissimilarity in colour, like at the bottom of the chair, you lot tin can go dorsum to your Magic Wand tool, upward the Tolerance value and brand a more defined selection, then apply this to your Layer Mask.
Next folio: Create cutouts using the Quick Selection and Refine Edge tools

Thanks for reading v articles this calendar month* Join now for unlimited access
Bask your first month for just £ane / $1 / €1
*Read 5 free articles per month without a subscription
Join now for unlimited admission
Try first month for just £1 / $1 / €1
Related articles
Source: https://www.creativebloq.com/how-to/how-to-remove-a-background-in-photoshop
Posted by: barneyhatints1986.blogspot.com
0 Response to "What Is The Checkered Background In Photoshop"
Post a Comment