

How To Get Ruler On Photoshop
Hither are several of my favorite tips for working with Grids, Guides and Rules in Photoshop!
Working with Rulers
• Command + R (Mac) | Control + R (Win) quickly displays rulers forth the meridian and left sides of a document.
• To quickly change the ruler'due south unit of measurement, Control -click (Mac) | right -click (Win) within the ruler area to select from the context sensitive menu.
• To display the Units & Rulers preferences, double click in the ruler area.
• To change the Ruler's point of origin (the zero signal of the rulers), click and drag the box in the upper left corner of the rulers (where they come across) and reposition. Double clicking at the intersection of the rulers resets the point of origin to the upper left corner of the open document.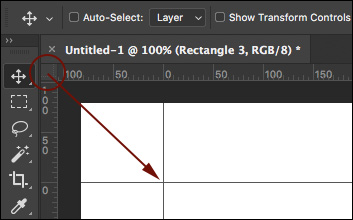
• In order to apace discover the center of an image, set the rulers to pct and drag out guides to the 50% marks (you tin as well utilize View > New guide only I find dragging faster).
Working with Grids
• Command + ' (Mac) | Control + ' (Win) toggles visibility of the grid.
• To create a grid that displays the "Rule of Thirds" overlay, choose Preferences > Guides, Grid & Slices. Set the "Gridline every:" to 100% and the "Subdivisions" to iii.
Working with Guides
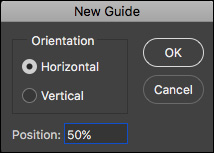
• To identify a unmarried guide at a specific location in a documents, choose View > New Guide. To enter a value that is different than the current units of measurement, type the value and so the unit (px, in, cm, mm, pt, pica, %).
• To add a guide using the rulers, click in the ruler area, and drag the guide into the certificate. Pick -drag (Mac) | Alt -drag (Win) from the ruler to toggle the orientation of the guide (vertical to horizontal).
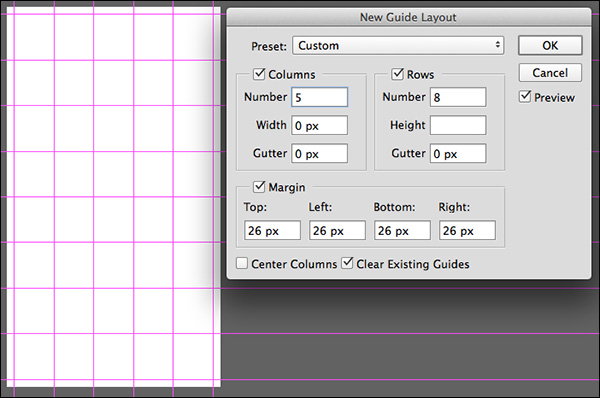
• To add multiple guides at one time, cull View > New Guide Layout. Non simply can you enter the number of Columns and Rows that y'all demand, but y'all tin too choose the Width or Height, Gutter, Margins and whether or not to Center the Columns. To reuse the guides in multiple images, save the guide options as a preset using the driblet-downwards menu. Here are some examples of the guides y'all can create:

Specific Columns Width and Rows with Gutter defined.
Guide Margin divers.
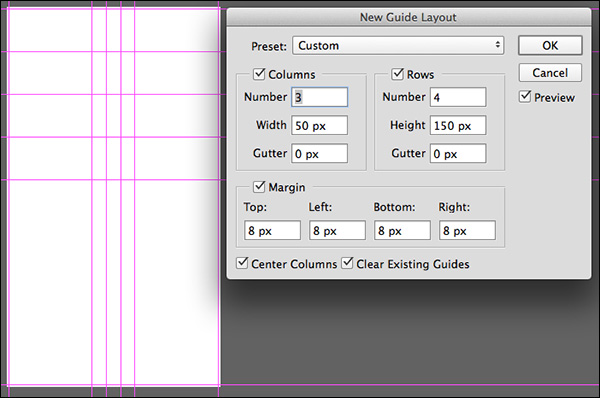
Centered Columns with numeric Width defined.
• To create a guides based on a shape, choose View > New Guide From Shape. And you're not limited to simply shape layers, you tin create Guides from Type layers and pixel based layers! As yous tin can come across from the examples below, the Guides are created based on the bounding box around the contents of the layer.

Guides created around Shape Layer.
Guides created around the contents of pixel layer.

Guides created from a Blazon Layer.
• To reposition a guide using the Move tool, position the Move tool straight on peak of the guide. When the icon changes to a double headed arrow, click and elevate to reposition the guide.
• Shift-drag a guide to snap it to the ruler tic marks. Note, this shortcut works even when "snap to" is off (View / Snap To…).
• Elevate a guide outside of the image area to quickly delete information technology.
• Command + ; (Mac) | Control + ; (Win) toggles the visibility of guides.
• Command + Option + ";" (Mac) | Control + Alt + ";" (Win) locks/unlocks guides (View > Lock Guides). When changing image size of a document, unlock the guides to resize the guides proportionally. Lock them if yous need to keep exact numeric values.
• Guides (and paths) can be difficult to see on loftier resolution monitors considering they are anti-aliased. To brand them announced thicker, select Preferences > Performance. In the Graphics Processor Settings, click Advanced Settings and uncheck Anti-alias Guides and Paths. Notation: y'all won't see the change until you click OK in both the Avant-garde Graphics Processor Settings and close the Preferences.
Changing the Color of Guides, Grids, and Slices
• To change the color of the guides (including Smart Guides), grid, and/or slices, select Preferences > Guides, Grid & Slices and either select a color from the drop-down listing, or, click in the colour swatch to the right and cull whatever colour y'all would like.
• To change the visual representation of the guides or grid, use the pull-down menu to choose line, dash, or dotted (Grid only).
Smart Guides
• Smart Guides can be tremendously helpful for aligning and determining distances betwixt multiple layers as they are being repositioned within a document. Check out the videos below to learn how.
In this episode of 3, 2, 1, Photoshop, you'll discover how to use Smart Guides to speedily align and distribute layers and shapes in Photoshop CC.
Pixel Grid
• If you Zoom into an epitome above 500%, a Pixel Grid is displayed on height of the prototype. This can be specially helpful when trying to align shapes such equally rectangles so that they begin and finish on a full pixel (to avert anti-aliased edges). However, to toggle this off, y'all can uncheck Pixel View nether View > Show Pixel Grid.
The analogy below demonstrates 3 options:
• The commencement shape was drawn with the Snap Vector Tools and Transforms to Pixel Grid preference turned on. As a result, all sides of the rectangle are solid (note, even though the initial rectangle shape might non take been drawn in perfect alignment to the pixel grid, Photoshop automatically snapped the rectangle to that grid considering the preference was turned on).
• The middle illustration was drawn with the Snap Vector Tools and Transforms to Pixel Grid preference turned off. This resulted in anti-aliased edges (varying levels of opacity) because the rectangle (the vector path) was non perfectly aligned to a pixel border when the rectangle was fatigued.
• The terminal illustration is the same rectangle as in the 2nd illustration ( the Snap Vector Tools and Transforms to Pixel Grid preference was turned off), however the Align Edges option was enabled for the rectangle shape layer (in the Options bar) after cartoon the rectangle. Enabling the Marshal Edges option "jumped" the fill of the rectangle to the nearest pixel filigree (you can still come across that the original shape (the black path), is not aligned to the pixel grid, only the make full is existence forced to Align Edges to the edges of the pixel grid. Align Edge is a convenient way to align objects to the pixel filigree on a "per shape layer" basis if you want to turn off the Snap Vector Tools and Transforms to Pixel Grid preference.
![]()
I await that near people will get out the Snap Vector Tools and Transforms to Pixel Filigree preference turned on as it volition help to avoid anti-aliased edges when drawing shapes as well every bit transforming them making alignment clean and precise.
Copyright © 2022 Julieanne Kost.
All rights reserved.

How To Get Ruler On Photoshop,
Source: https://jkost.com/blog/2017/05/grid-guides-and-ruler-shortcuts-in-photoshop-cc.html
Posted by: barneyhatints1986.blogspot.com
0 Response to "How To Get Ruler On Photoshop"
Post a Comment